Device Setup
How to connect your first PackCam device and log in
Last updated: March 12, 2026
Step 1 — Power On the Device
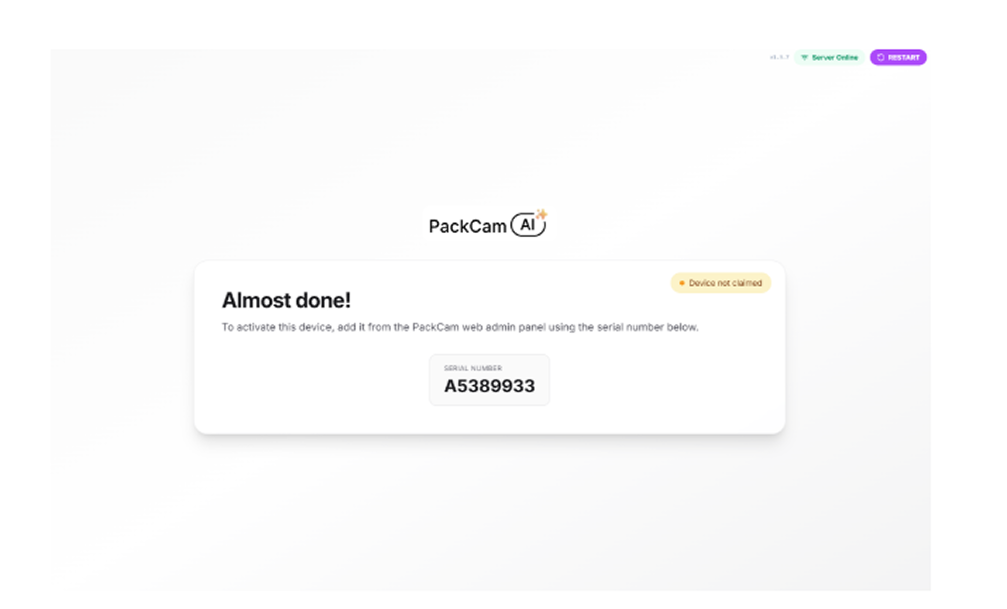
Plug in and power on your PackCam device. Allow it to fully boot. Once ready, it will display its Serial Number on the screen (e.g., PC-1A2B3C4D). Write this number down — you will need it.
Step 2 — Claim the Device in the Admin Panel
Claiming links the physical device to your admin account so you can manage it, view its videos, and bind a packstation to it.
Where: Admin Panel → Orders → Devices section (top of page) → + Add Manually button
- In the Admin Panel, go to Orders.
- At the top of the page you will see the Devices section.
- Click the + Add Manually button.
- Type in the Serial Number exactly as shown on the device screen.
- Click Claim.
The device will now appear in the devices section. You can give it a custom name (e.g., “Station 1”, “Dock A”) by clicking the edit icon next to its name.
Discover devices: You can also click the Discover devices button — nearby unclaimed devices will appear and can be claimed directly.
Troubleshooting:
- Serial number not found → make sure the device is powered on and connected to the internet.
- Already claimed → the device belongs to another account; contact support.
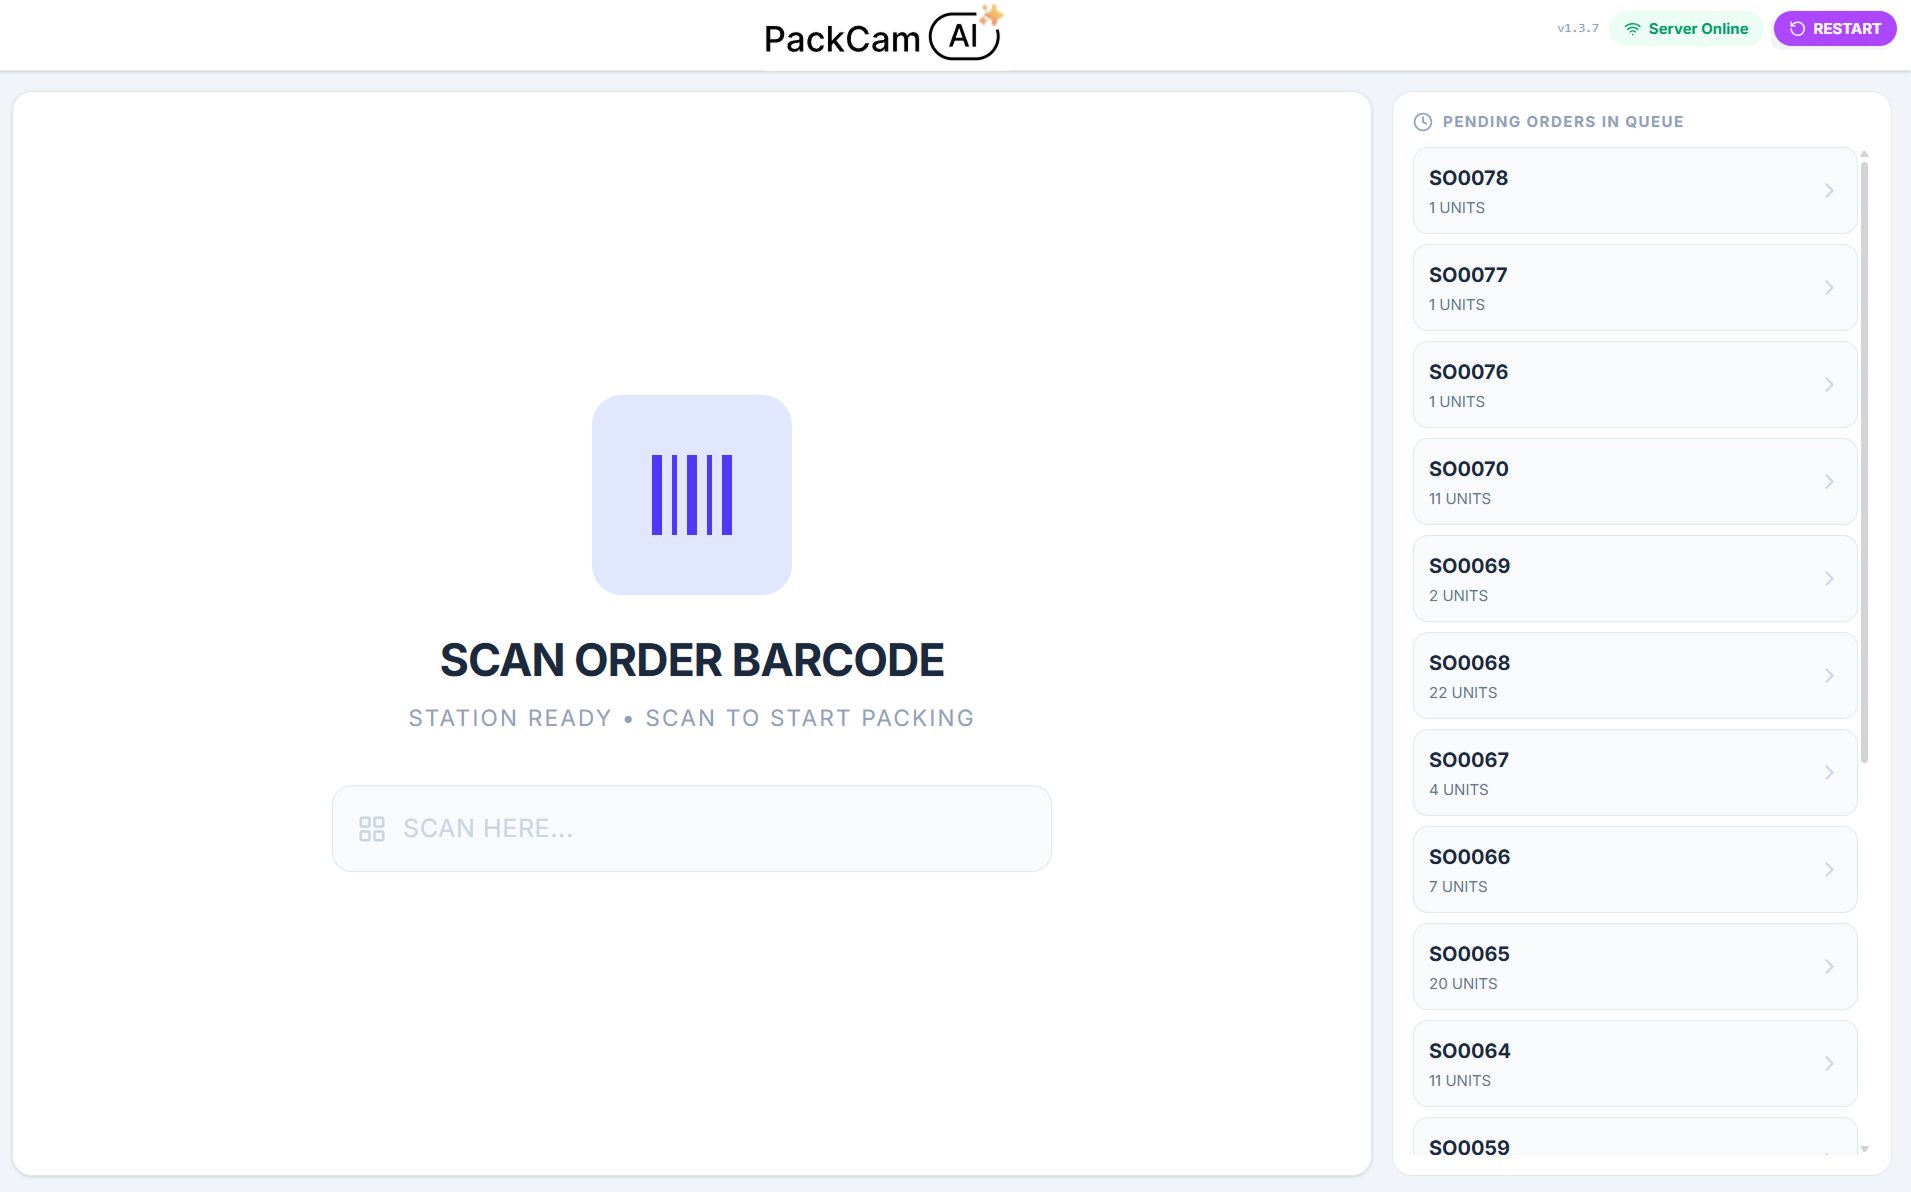
Step 3 — Log In on the Device
After claiming the device from the Admin Panel, you need to log in on the device itself to activate it.
Option A — QR Code Login (recommended):
- Generate a QR code for the employee (or admin) from the Admin Panel → QR Codes → Employees.
- At the device, select Scan QR Code to login.
- Hold the QR code in front of the device camera.
- The device logs in automatically.
Option B — Manual Login:
- At the device, select Manual Login.
- Enter your Team Name, Email, and Password.
- Confirm to log in.
Once logged in, the device is ready to record. To enable automatic order detection (auto start/stop recording, SKU scan detection), you must also bind a Packstation to it — see Binding a Packstation.
Managing Devices
Your device will appear as online (green dot) in the Devices section when it’s powered on and connected to the internet. A gray dot means it’s offline.
Where: Admin Panel → Orders → Devices section (top of page)
| Action | How |
|---|---|
| Rename a device | Click the pencil/edit icon next to the device name, type a new name, click Save |
| Check online status | Green dot = online, Gray dot = offline |
| Unbind from packstation | Open device menu → “Unbind from packstation” |
| Unclaim a device | Open device menu → “Unclaim device” |
| See binding status | ”Claimed” badge shows the device is bound to a packstation |